This Wheat Sandwich Bread has all the heartiness of whole wheat flour but without any density or bitterness. The ratio of whole wheat four to all-purpose flour is perfectly balanced. This perfect sandwich bread is tender and one you’ll make again and again.
I never bake or buy classic white bread. As an adult, I switched to wheat bread because it’s healthier. The only exception to white bread that I eat is Artisan Sourdough Bread, because it’s healthier. Lately, I’ve obsessed with perfecting baking homemade sourdough bread. (I have a few sourdough recipes on hold for future posts, once I perfect them.)
My pantry is loaded with a wide variety King Arthur Flour flours and baking ingredients. I subscribe to their newsletter and I bought their “Big Book of Bread“. That’s where this recipe comes from.
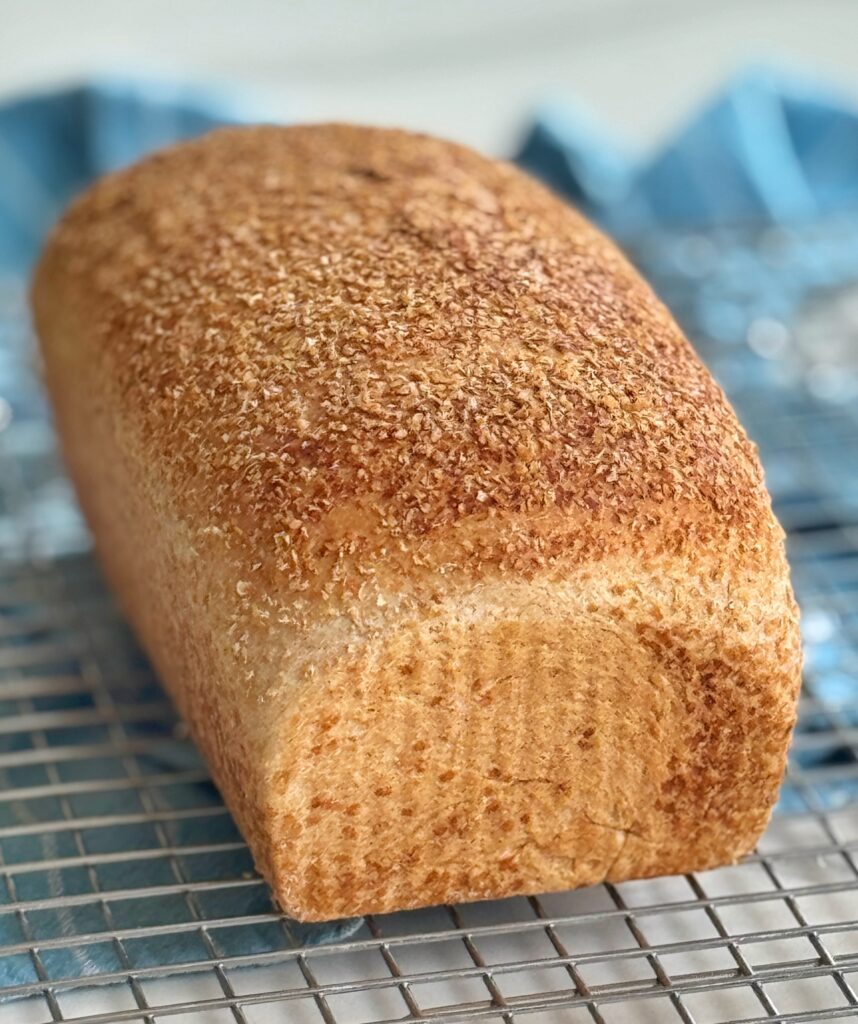
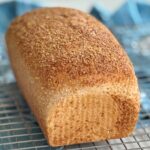
What a beauty!
I used my stand mixer, but you can certainly hand mix this (instructions are in the recipe card). This will be perfect for sandwiches and morning toast. Let me show you how easy this is to make!
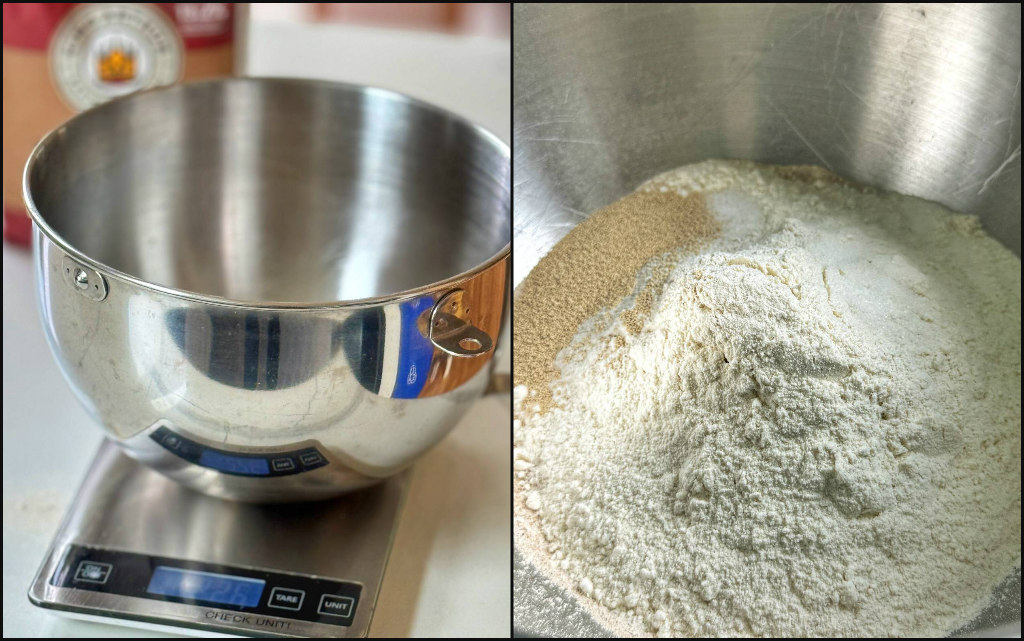
It is highly recommended to use a digital scale to weight the ingredients by grams, instead of by cups. Baking is science and it really makes a difference. All of the dry ingredient are measured into the bowl of my stand mixer. I didn’t photograph adding the softened butter, honey and milk. The stand mixer combined all of the ingredients in about 8 minutes, total.
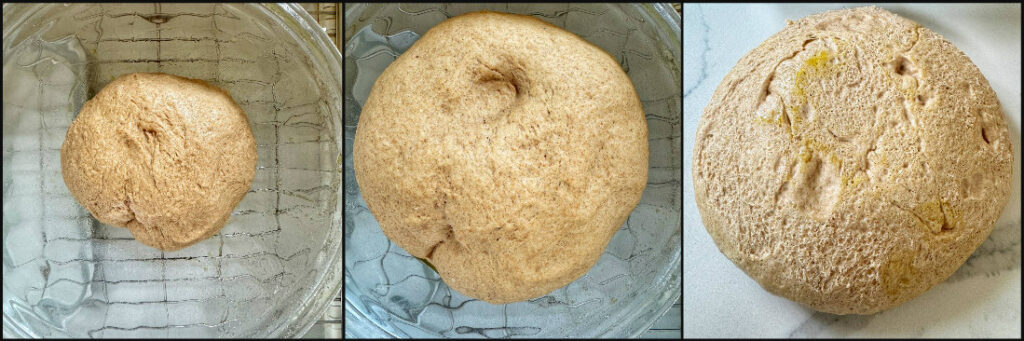
My Brod & Taylor Proofing Box has changed how I proof my dough, especially during cold winter months. It’s foldable (for storage) and sets up in seconds. The proofing temperature is set to 75F. In one hour, the dough had doubled (middle photos).
Once the dough was removed and the bowl flipped over, the dough slide right out.
You could add a light dusting of flour to shape the dough. Since I have quartz countertops, I use a spray bottle to lightly mist with water (to prevent sticking). Gently deflate the dough and pat it into an 8″ x 12″ rectangle. There are more than one way to roll the dough into a log. Here, I just rolled the dough and pinched the steams. Done!
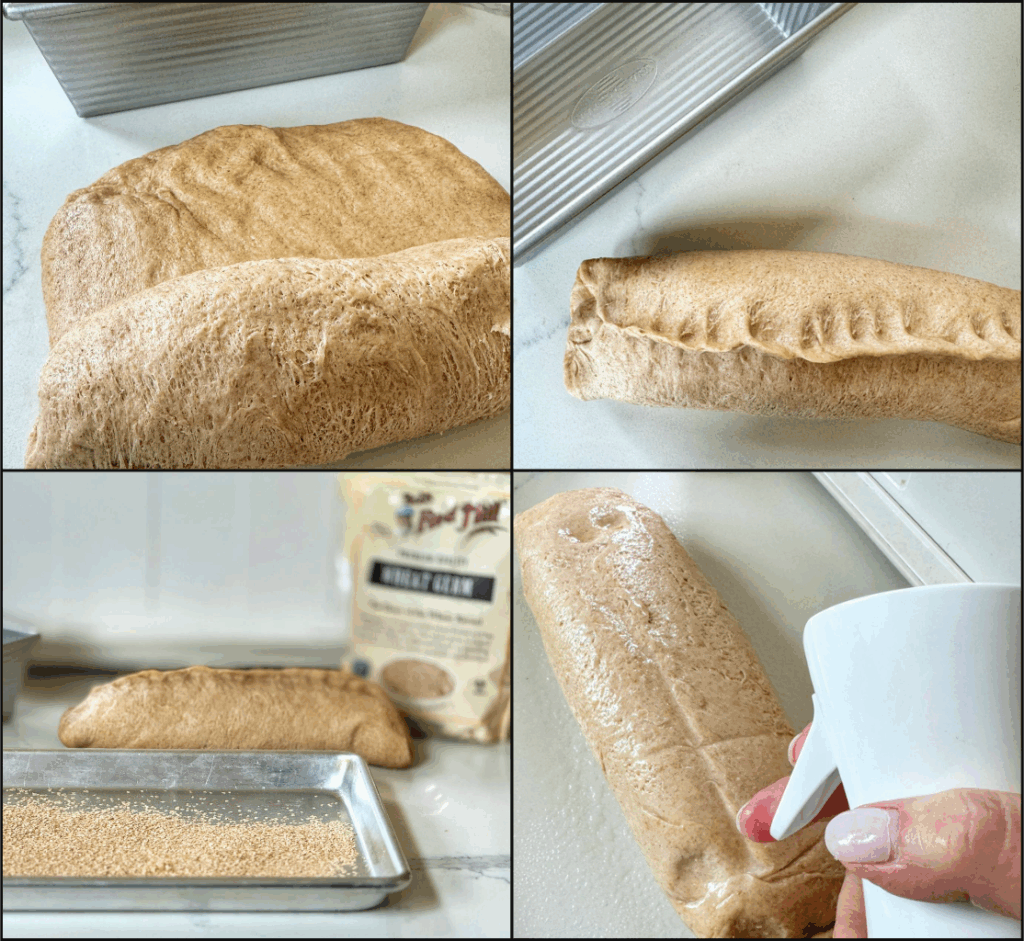
I’m so glad that I didn’t skip the step of rolling the bread in wheat germ because it makes the bread look professional. King Arthur Flour recommends wetting a clean kitchen towel and then rolling the bread dough to wet it. My sprayer worked just as well by just misting the dough until moist.
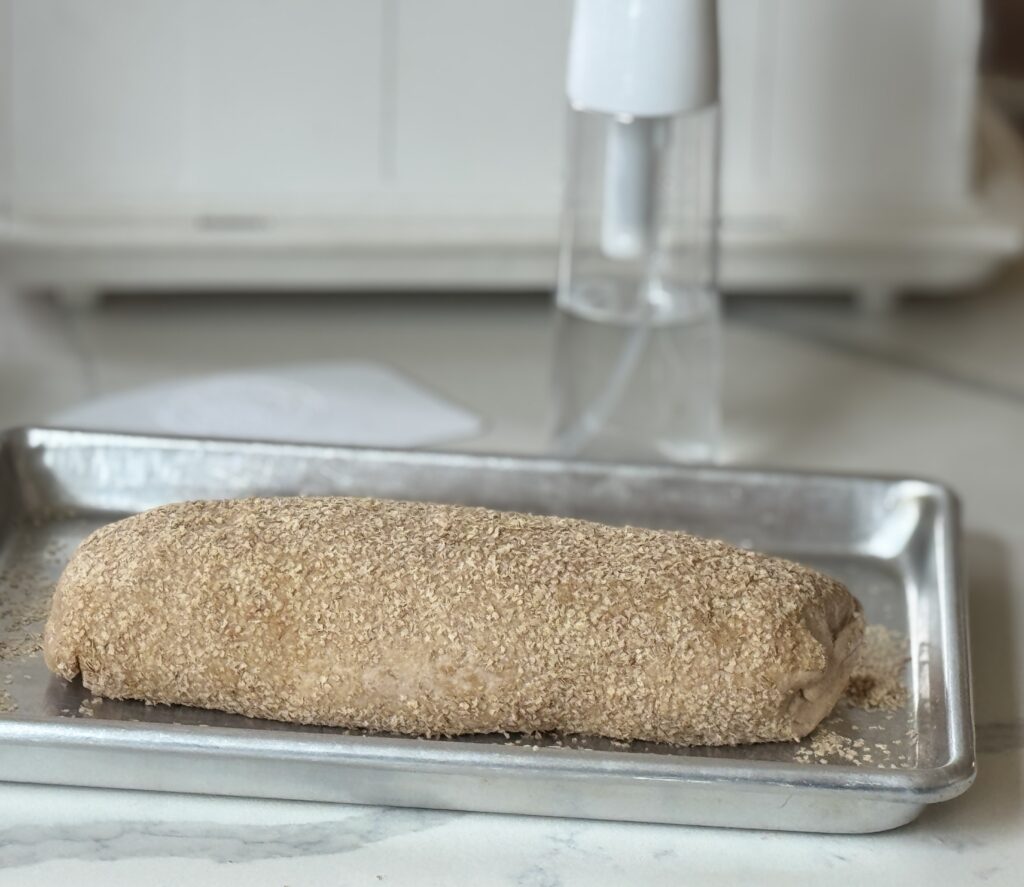
That was easy! Time to pop this into the loaf pan for its second proof into the proofing box.
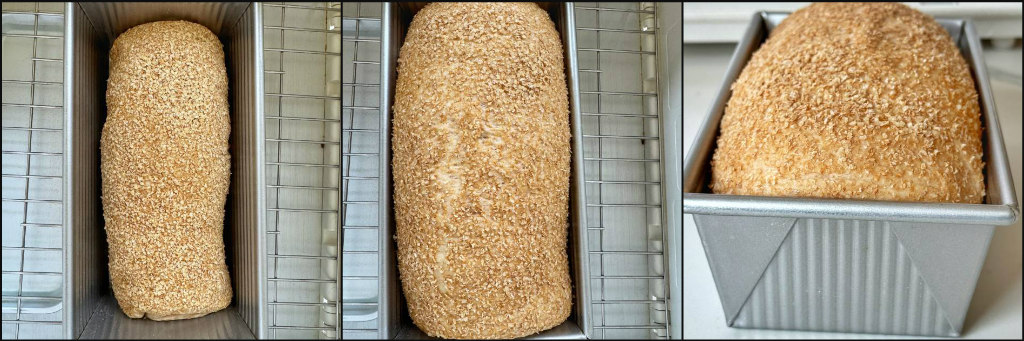
The recipe said it could take 1-1/2 hours to 2 hours to proof. The proofing box did the job in just just a tad over one hour. The oven is preheated to 350F.
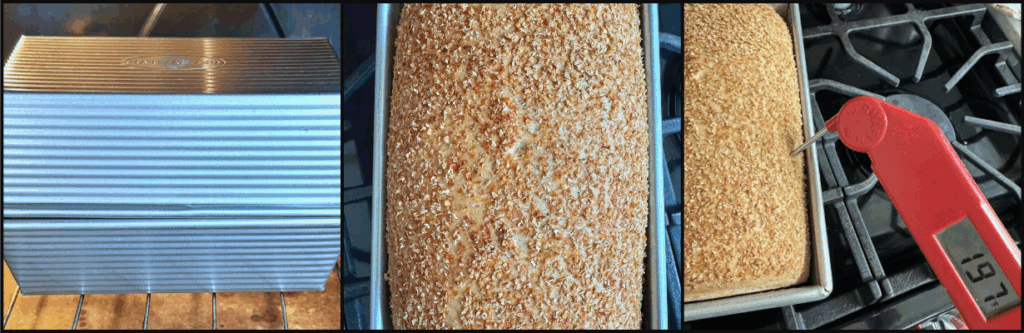
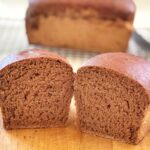
The bread should bake in 35-40 minutes. Depending on how dark you like the bread, you can set foil over the loaf if it’s getting too dark. We prefer our loaves to be a golden color. Instead of foil, I set another pan right on top. Voila! 190F is the temperature we’re aiming for. The thermometer was a few degrees over. (The bread was still moist.)

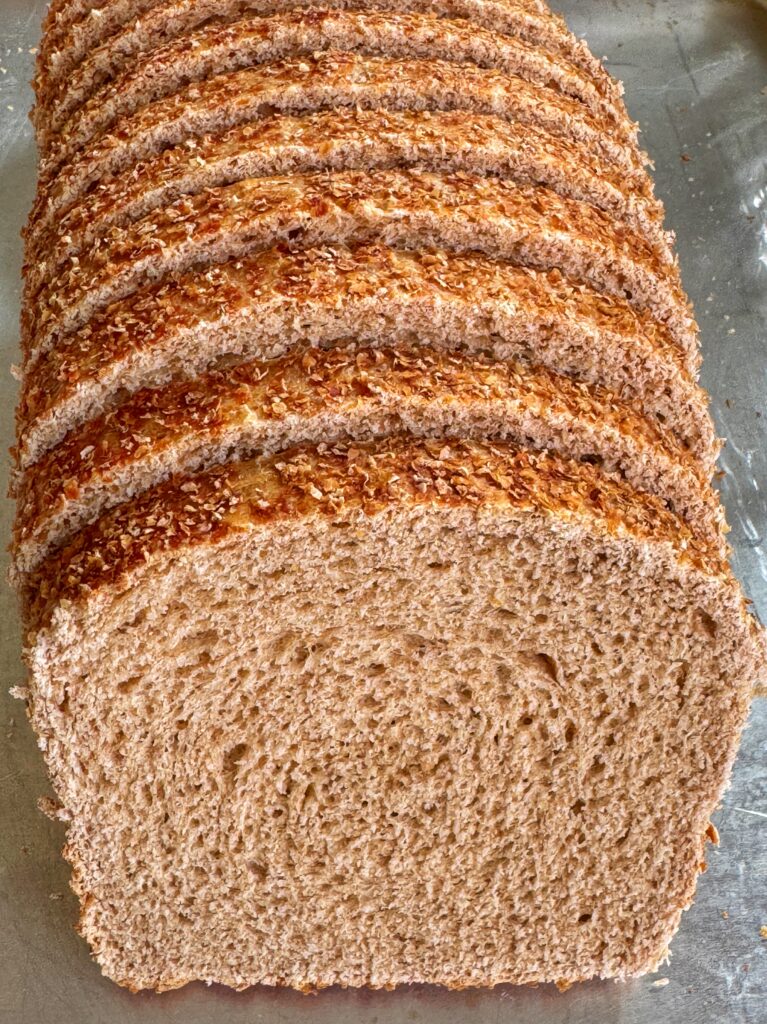
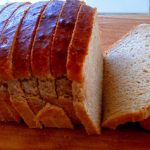
The USA Bread Loaf Pans that I use are non-stick. This loaf came right out without any fuss! Place the bread on a cooling rack, Ideally, you’ll want to wait to slice when completely cool. But, who can wait that long?!
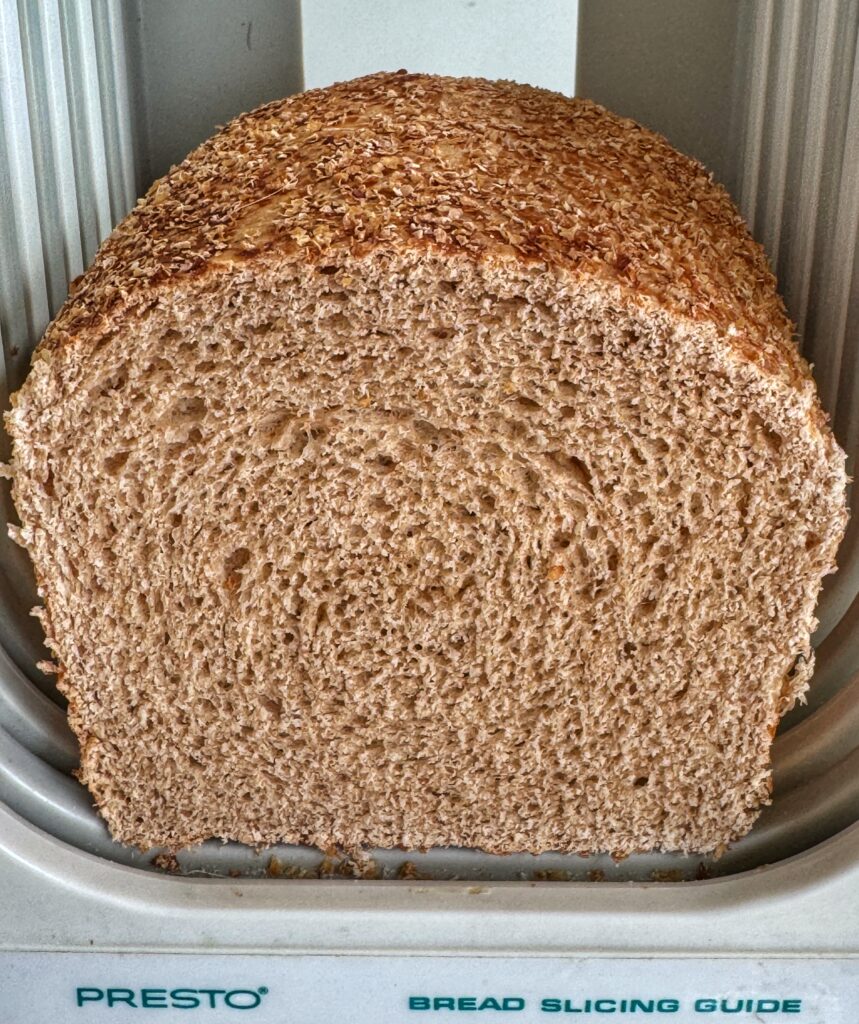
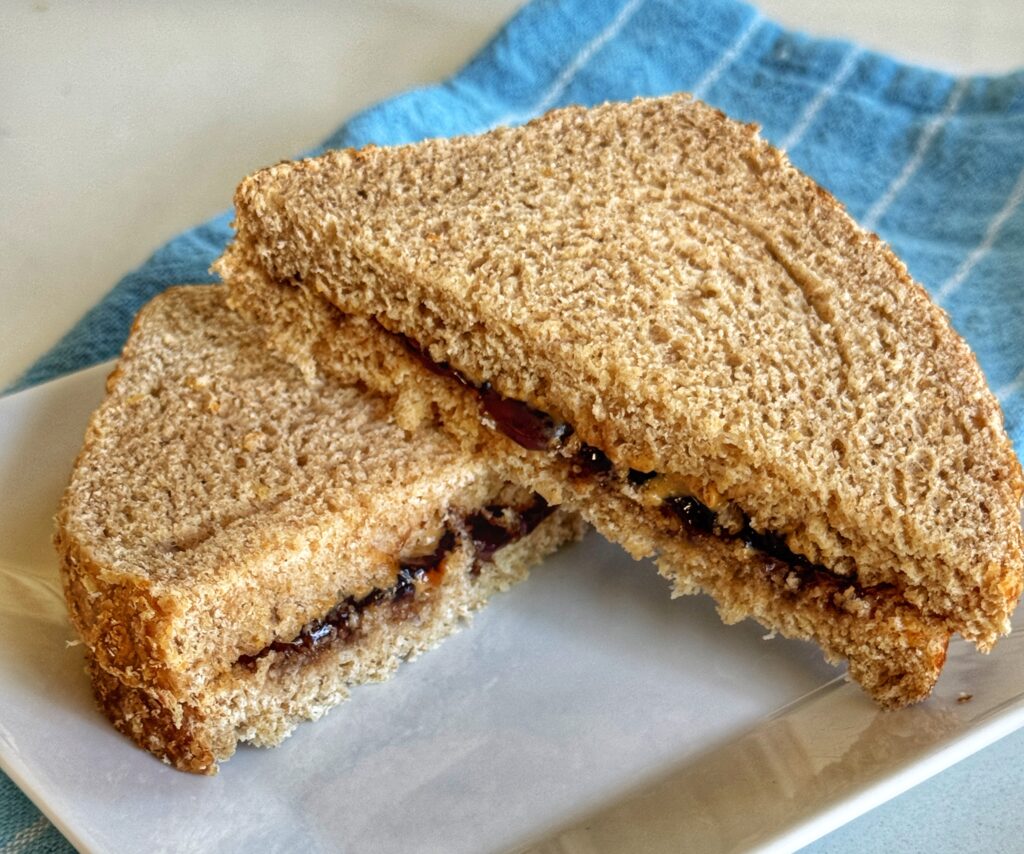
I wish this bread slicing guide with an electric knife was still sold. I’ve owned it for many years and it still works great. Look at the crumb! Happy Dance.
I can hardly wait to taste this bread. I’m going in!
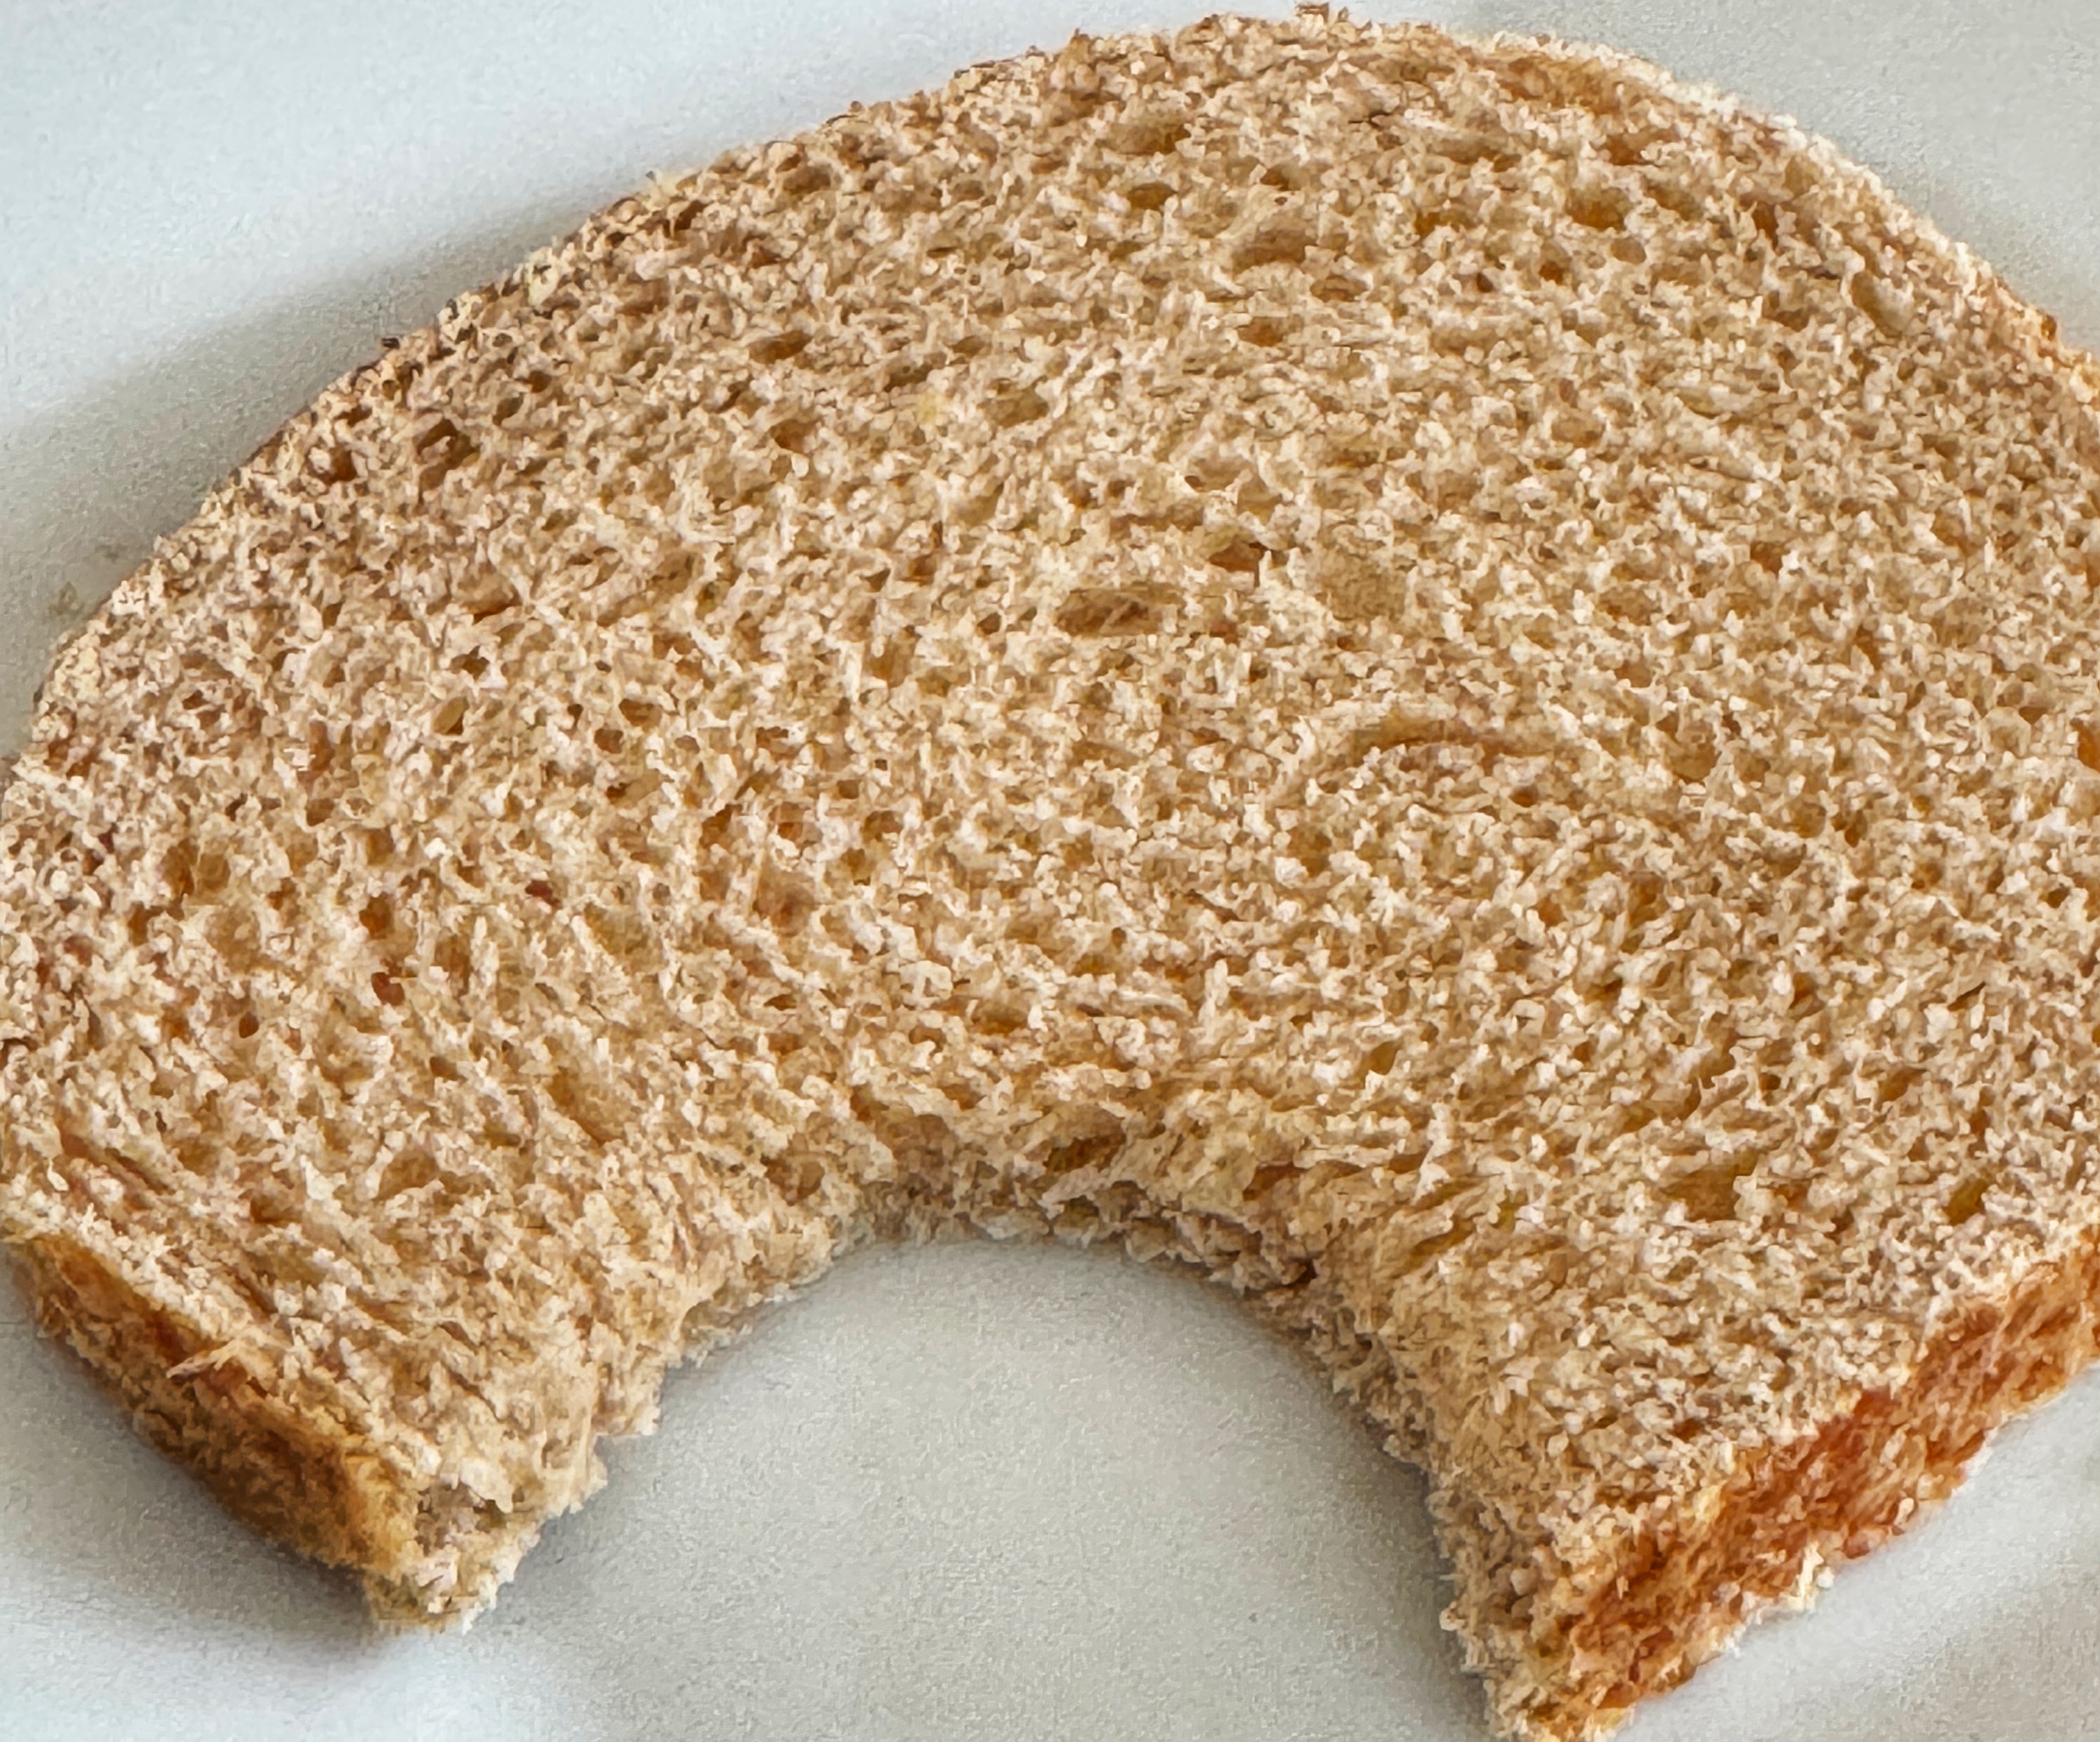
TASTING NOTES: Sometimes wheat bread can have a bitter taste. Not this bread recipe! The all-purpose flour helps to balance any bitterness, yet the wheat flavor really shines. The bread is soft and moist. This was my morning toast, as well as an afternoon PBJ sandwich. I still love the Multi-Grain Bread recipe that I’ve made multiple times. This recipe was super easy to make– especially if I don’t have 7-Grain Hot Cereal Mix in my pantry to make a Multi-Grain Bread.
Everyday Wheat Sandwich Bread Recipe
Equipment
- Digital Scale highly recommended for more accurate measurements
- Bowl Scraper Perfect tool for hand mixing or removing proofed dough from a bowl.
- Spray Bottle I use this mister for ALL of my bread baking; so many uses
- Proofing Box My best investment for proofing dough
- Digital thermometer accurate reading of baked bread
Ingredients
- 226 grams Whole Wheat Flour 2 cups; recommended King Arthur Flour Whole Wheat Flour or King Arthur Flour Golden Wheat Flour
- 150 grans Unbleached All-Purpose Flour 1¼ cups; recommended King Arthur Flour Unbleached All-Purpose Flour–plus more for dusting
- 1 1/4 teaspoons table salt
- 6 grams instant yeast 2 teaspoons; recommended SAF Instant Yeast
- 42 grams honey 2 teaspoons
- 28 grams unsalted butter 2 tablespoons; room temperature
- 1 1/4 cups milk 284g; warm (110°F); whole preferred
- 1/4 cup wheat germ 28g; for coating
Instructions
BEFORE YOU BEGIN:
- Weigh your flour for the most accurate measurements. Likewise measure it by gently spooning it into a cup, then sweeping off any excess.
For a stand mixer:
- In a large bowl or the bowl of a stand mixer fit with the dough hook, combine the flours, salt, and yeast.
- Add the honey, butter, and milk, mixing until no dry patches of flour remain and a soft dough forms.Mix on medium speed until smooth, elastic, and pulling away from the sides of the bowl, 5 to 8 minutes for either method.NOTE: The dough was a bit too soft and was not pulling away from the sides of the bowl. I added one tablespoon flour to the dough, mixing for one minute each time. The total added was 4 tablespoons flour for the dough to pull away from the side of the bowl.
Hand mixing:
- If mixing by hand, cover and rest for 15 minutes. It’s particularly important to let this dough rest after it’s mixed but before it’s kneaded, as it gives the bran in the whole wheat flour time to hydrate and soften, which makes the dough less sticky and easier to mix.
- Transfer the dough to a lightly floured surface and knead until a tacky, springy dough forms.
Proof the dough:
- Return the dough to the bowl, cover, and let it rise until puffy but not necessarily doubled in volume, 1 to 1 1/2 hours.NOTE: In my proofing box the dough doubled in one hour.
Shape & Coat the Bread Dough:
- Use a bowl scraper to gently ease the dough out of the bowl onto a lightly floured work surface.
- Gently deflate the dough and pat it into an 8″ x 12″ rectangle.
- Shape the dough into a log by bringing the short edges toward the center, overlapping them slightly. Flatten the dough into an even layer, then starting from the top, gently roll the dough towards you to form a log and pinch the seam to seal.
- Grease an 8 1/2" x 4 1/2" loaf pan.NOTE: I use USA Bread Loaf pans.They have a non-stick surface so that greasing the pans has not been necessary. Never wash them in the dishwasher, or it will remove the non-stick coating.
- Spread the wheat germ on a rimmed baking sheet in an even layer the length of the dough log. Wet a clean kitchen towel, then wring it out; it should still be pretty damp. Roll the shaped dough over the towel to moisten the loaf, then into the wheat germ, turning to coat.ALTERNATIVE: Rather than using a wet towel, I use my handy dandy spayer to miss the rolled bread dough. This works perfectly for coating with the wheat germ.
Final proof:
- Place the dough seam-side down in the prepared pan. Cover and let rise until the loaf crowns about 1" over the edge of the pan, 1 1/2 to 2 hours. NOTE: In my proofing box, this took slightly over one hour!
- Towards the end of the rising time, preheat the oven to 350°F.
- Bake the loaf for 35 to 40 minutes, or until the top is golden brown and the internal temperature is at least 190°F.If the loaf is browning too quickly, tent it loosely with foil and continue baking. ALTERNATIVE: Instead of using foil, I top the bread with another loaf pan. This also prevents over browing.Remove the loaf from the oven then turn it out of the pan and onto a rack to cool completely before slicing.
- Store airtight at room temperature for several days; freeze, sliced, for longer storage.
Notes
Nutrition


Leave a Reply