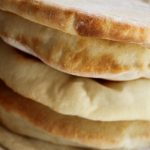
Homemade Greek-Style Pita Bread
This Greek-Style Pita bread is surprisingly easy to make at home and so much better than the dry and tough versions that comes in bags from the grocery store. The dough is a breeze to work with, and puffs up beautifully in the oven, then relaxes to a "pita pocket" bread that has endless "stuffing" possibilities. We particularly enjoy this bread with homemade Ground Lamb Gyros.
Servings 8 pitas
Calories 266kcal
Ingredients
- 3 1/2 cups bread flour (20 1/8 ounces)
- 2 1/2 tsp rapid-rise yeast or instant yeast
- 2 tsp salt
- 1 1/2 cups water room temperature
- 1/4 cup olive oil
- 2 1/2 tsp sugar
For the dry ingredients:
Instructions
For the dry ingredients:
- Whisk the flour, yeast and salt together in the bowl of a stand mixer.
For the wet ingredients:
- Whisk water, oil and sugar in a 4-cup liquid measuring cup until the sugar has dissolved.
- Mix the dough:
- On low speed, using the dough hook, slowly add the wet ingredients to the dough and mix until the dough becomes cohesive and starts to form-- no dry flour remains. Keep scraping down the ingredients, about 2 minutes. Be patient, it will happen!
- Increase the speed to medium low and knead until the dough is smooth and elastic and clears the side of the bowl-- about 8 minutes.
- Transfer the dough to a lightly floured surface and knead by hand to form a smooth, round ball, about 30 seconds. Place the dough seam side down in a lightly greased bowl or container, cover tightly with plastic wrap, and let it rise until double in size, 1 to 1 1/2 hours.
Shape and rolling the pitas:
- Press down on the dough to deflate. Transfer the dough to a lightly floured counter and divide into quarters, then cut each quarter into halves (a bench scraper makes this easiest). Cover loosely with plastic wrap.
- Working with each piece of dough, one at a time (keep the remaining dough covered), for the dough into a rough ball by stretching the dough around your thumbs and pinching the edges together so that the top is smooth.
- Generously coat one dough ball with flour and pace on a well-floured counter. Press and roll into an 8-inch round of even thickness and cover loosely with great plastic wrap. NOTE: If the dough resists stretching, let it relax for 10-20 minutes. Repeat with the remaining balls. Let the dough rounds rest for 20 minutes.
- One hour before baking, adjust the oven rack to lower-middle position, place a baking stone on the rack and heat the oven to 500 degrees. Gently transfer 2 dough rounds to well-floured pizza peel. Slide the rounds onto the stone and bake until single air pocket is just beginning to form, about 1 minute.
- Working quickly, flip the pitas using a metal spatula and continue to bake until golden brown, 1 to 2 minutes.
- Transfer the pitas to a plate and cover with a clean dish towel OR transfer to a baking sheet with a rack and cover with a clean towel. The pitas will be puffy, but will relax after a few minutes. Allow them to cool 10 minutes before serving.
WHOLE WHEAT VARIATION
- Reduce the bread flour to 1 3/4 cups (9 2/3 ounces) and combine with 1 3/4 cups (9 2/3 ounces) whole-wheat flour in step 1.
Notes
Recommended baking supplies/equipment:
- Stand Mixer (of course, you can do this all by hand!)
- Baking Stone (wouldn't be without it for pizza or bread baking)
- Pizza peel