I’m an aspiring bread baker who has never taken formal classes on the art. There is nothing like the aroma of freshly baked bread– and when you can teach yourself to bake an Artisan baguettes in your own home, it’s so gratifying. This recipe is really simple to make, and very cost-effective. It’s so worth the effort, and it’s fun and delicious! PS: This recipe is perfect for those of you who don’t own special bread baking tools.
Like a Little League Player, who hits their first home run– or a beginner golfer who hits a hole-in-one, that’s how I feel about making these Classic Baguettes. I have been longing to learn how to bake more Artisinal Breads, ever since I bought Peter Reinhart’s “The Bread Baker’s Apprentice“.
I’m not the least bit afraid of working with yeast. I love baking cinnamon rolls, dinner rolls and traditional bread loaves. But learning how to shape crusty breads is something that I imagined would take a lot of practice and time– and I’ve procrastinated taking the plunge in these uncharted waters, for me. Let’s do it!
The first step was in making the starter, which was quite easy. I used SAF instant yeast, King Arthur Unbleached Flour, and water and mixed it with my Danish Dough whisk. Easy peasy, less than five minutes. Done. Time to go to bed. The starter needs about 14 hours to become bubbly– like thick pancake batter.
This morning, I peeked at my starter. What a relief it was to find that the starter was a success.
I used my Kitchen Aid Stand Mixer and added more bread flour, instant yeast, water and salt. The mixer kneaded the dough for about five minutes. Of course, you can knead the dough by hand– and sometimes I do that, because I enjoy working with my hands. Today, however, I took the easy route.
I really like dough buckets, because I can visually see how much my dough rises. They can pull double duty, for marinating meats– as long as they are properly washed, of course, to kill any bacteria. But an oil-lined bowl, covered with plastic wrap works just as well. The dough needs three hours for the yeast to do it’s work.
I don’t have a fancy proofing drawer, so I turn my oven into one. I simply turn it on WARM for 2 minutes, then shut it off. I do this while the dough is kneading. The dough needs three hours of proofing, total. However, at one hour, I had to gently deflate the dough, flip it over and leave it alone for the remaining two hours. So far, easy, right?
In the meantime, I had a field day watching various You Tube videos on shaping baguettes. There is quite an art to this, and professional bakers have a clear advantage with professional ovens, a baking couche (that I don’t own…yet), peels, special bread pans and various tools– and years of experience, of course. I had to think of what tools I did own that could work (more on that later).
Three hours later, it’s time to shape the baguettes. Gulp. I learned that wetting my hands, a bit, helped to handle the soft dough without it sticking. I can see that the yeast is doing it’s job, by the bubbles.
The dough stretches very easily. That’s a good sign. So, using my bench scraper (a tool I can’t be without), the dough is divided into three pieces. Um, I should weigh the pieces, I know. I don’t. Close enough.
I use a non-stick baking mat for just about everything. With a light dusting of flour on the mat, and on my hands, I began to shape the dough into baguettes. Not too hard! I decided to make my own baking couche by heavily flouring a clean linen towel. I used the folds to cradle each baguette.
I sprayed some plastic wrap with olive oil spray (otherwise it can stick to the rolls) and let them proof for 1-1/2 hours. The loaves aren’t meant to rise a LOT– just get a little puffy. What I was most nervous about was transferring the shaped baguette dough onto my baking stone. I can’t tell you how many mishaps I’ve had, where I’ve missed. This isn’t fun when it comes to making pizza, trust me. Today, I finally bought the pizza peel I’ve always wanted, but I’m going to show you how you can improvise using a baking sheet and parchment paper.
You can’t really see it, but I have a couple of clear white plastic flexible cutting mats. By carefully lifting my makeshift “couche” I gently rolled a baguette onto the cutting mat (since I didn’t own a baker’s “transfer board”. It worked! From there I gently rolled each baguette onto an inverted baking sheet, covered with parchment paper. TIP: one of the baguettes stuck to the towel. I used the bench scraper to, very gently, unstick it. Success!
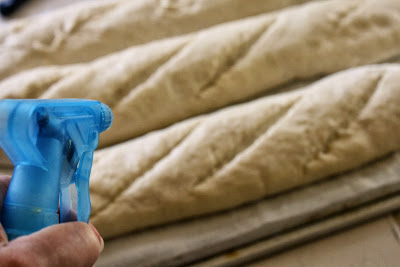
Using my bench scraper, I shaped each roll to be as even as I could. Last, the slash marks. I used a serrated knife, dipped in water and quickly slashed one loaf. 1-2-3. That didn’t work as well as when I switched to a very sharp knife, dipped in water. Much better! Easy, peasy.
To get a crusty exterior, I sprayed the loaves with lukewarm water. Plus, I filled one of my small cast-iron skillets with water. That was placed on the very bottom rack of my gas oven, and my baking stone was preheated one level above it at 450F. I love my baking stone, by the way. I bought it from King Arthur Flour, and have used it for several years. No more soggy pizza crusts! I always leave it in my oven.
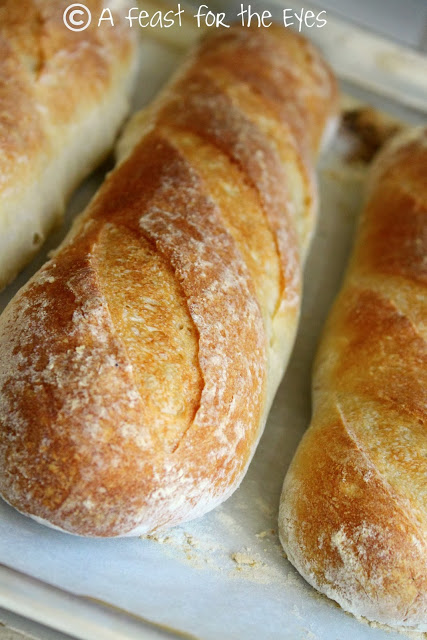
THE FINAL FRONTIER: The inverted baking sheet works, somewhat, like a pizza peel. I pulled out the baking rack, with the pizza stone. Very carefully, I aligned my baking sheet of shaped rolls and very carefully I slid the parchment paper filled breads onto the baking stone. Success! However, I really did order the aforementioned pizza peel. I think it’ll take the stress out of doing this, in the future.
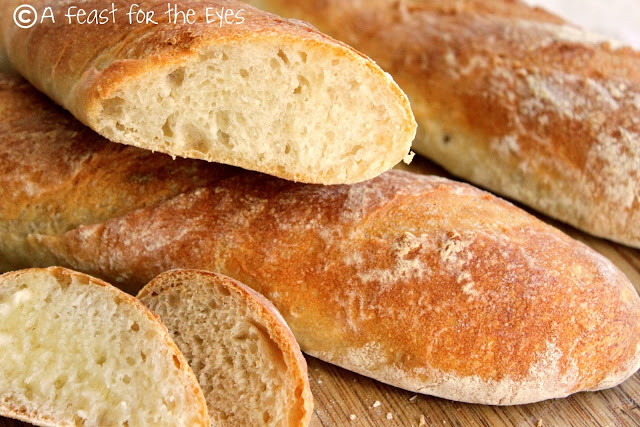
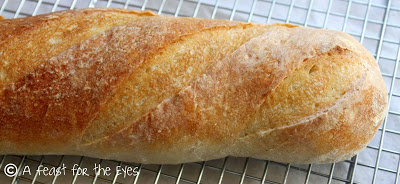
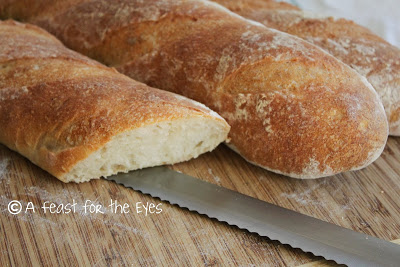
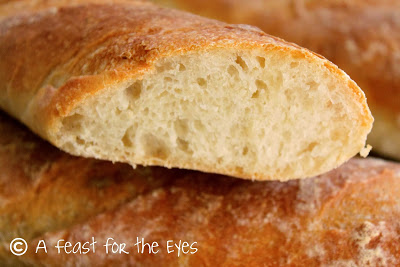
25 minutes later, the aroma of freshly baked bread got my son’s attention. What a feeling!
Classic Baguettes (Perfect for the beginner bread baker)
Ingredients
STARTER: (Make this the night before)
- 1/2 cup cool water
- 1/16 teaspoon active dry yeast or instant yeast I used SAF Instant Yeast
- 1 cup King Arthur Unbleached Bread Flour I never use bleached flour
DOUGH:
- 1 teaspoon active dry yeast or instant yeast
- 1 to 1-1/4 cup lukewarm water*
- All of the starter
- 3 1/2 cups King Arthur Unbleached Bread Flour
- 1 1/2 to 2 teaspoons salt to taste
Instructions
- Make the starter by mixing the yeast with the water (no need to do this if you’re using instant yeast), then mixing in the flour to make a soft dough. NOTE: I had to use about 3/4 cup water to get a soft dough, and it worked.
- Cover and let rest at room temperature for about 14 hours; overnight works well.
- The starter should have risen and become bubbly. If it hasn't, your yeast may not be working. NOTE: Dissolve 1/4 teaspoon of yeast in 1 tablespoon lukewarm water with a pinch of sugar, and wait 15 minutes. If nothing happens, replace your yeast, and begin the starter process again.
- Note: I keep my SAF Instant yeast in the freezer, and it lasts for a long time.
- If you’re using active dry yeast, mix it with the water, then combine with the starter, flour, and salt.
- If you’re using instant yeast, there’s no need to combine it with the water first.
- Mix and knead everything together by hand, mixer or bread machine set on the dough cycle till you've made a soft, somewhat smooth dough; it should be cohesive, but the surface may still be a bit rough. Knead for about 5 minutes on speed 2 of a stand mixer.
- Note: I used my Kitchen Aid Stand mixer, which is the easiest way (in my opinion),
- Place the dough in a lightly greased medium-size bowl, cover the bowl, and let the dough rise for 3 hours, gently deflating it and turning it over after 1 hour, and then again after 2 hours.
- Turn the dough out onto a lightly greased work surface. Divide it into three equal pieces.
- Note: I wet my hands, which makes handling the soft dough very easy to do.
- Shape each piece into a rough, slightly flattened oval, cover with greased plastic wrap, and let them rest for 15 minutes.
To shape the dough:
- Working with one piece of dough at a time, fold the dough in half lengthwise, and seal the edges with the heel of your hand. Flatten it slightly, and fold and seal again.
- Note: I use a large plastic mat, very lightly dusted with flour, and my hands are lightly dusted with flour.
- With the seam-side down, cup your fingers and gently roll the dough into a 15-inch log. Place the logs seam-side down into the wells of a baguette pan; or onto a lightly greased or parchment-lined sheet pan or pans.*
- Note: I made my own baking couche, by placing a clean pure cotton towel across the length of a baking sheet. I then rubbed a LOT of flour into the towel. I placed one piece of shaped dough on top, and cradled it with the fold of the towel, and did this with the remaining shaped dough. I had three rolls of dough “cradled” with the towel.
- Cover them with a cover or lightly greased plastic wrap, and allow the loaves to rise till they’ve become very puffy, about 1 1/2 hours.
- Towards the end of the rising time, preheat your oven to 450°F; if you’re using a baking stone, place it on the lowest rack (I placed it on the second to lowest rack, to leave room for a pan of water).
- Note: I don’t own a convection oven, so I filled my cast iron skillet with water and placed that on the very bottom rack of my oven.
- Using a very sharp knife held at about a 45° angle, make three 8-inch vertical slashes in each baguette– think “1-2-3” very quickly and slash as fast as you can.
- Spritz the baguettes heavily with warm water; this will help them develop a crackly-crisp crust.
How I transferred the dough onto my baking stone:
- Place a baking sheet, upside down, right next to the pan of proofed and shaped dough. I don't own a "transfer board" so I used a flexible cutting mat. I gently rolled one piece of dough onto the flexible mat and then guided it onto the inverted baking sheet with a sheet of parchment paper. This technique worked, and prevented my dropping the dough and causing it to deflate too much.
- Bake the baguettes until they’re a very deep golden brown, 25 to 30 minutes. Remove them from the oven and cool on a rack. Or, for the very crispiest baguettes, turn off the oven, crack it open about 2inches, and allow the baguettes to cool in the oven.
- Yield: Three 16-inch baguettes.
Notes






They look perfect and I'm surprised you could even wait 10 minutes :-).
The rewards are many when you bake bread.
Wow, you really did hit a home run Debby. They look as good as if they came from a French boulangerie.
Sam
Debby, this project turned out perfect. I am wondering if using bread flour makes a great bit of difference compared to using regular flour. I have never made my starter the night before. That is one thing I love about these blogs. You can always learn something new.
Gorgeous! I am going to give this one a try, they look so yummy.
They look beautiful!
I've made yeast breads for years but not a baguette! I'm going to try these.
Way to go…they look wonderful. I think I would have my tub of butter and a knife in action before the ten minute mark!
These are some beautiful loaves! you did such a great job!!
I need this recipe in my life, bread making still spooks me, but if this has your stamp of approval, I'm in!
I'm going to try this!!! Thanks so much for posting. Can't wait for your sourdough version!