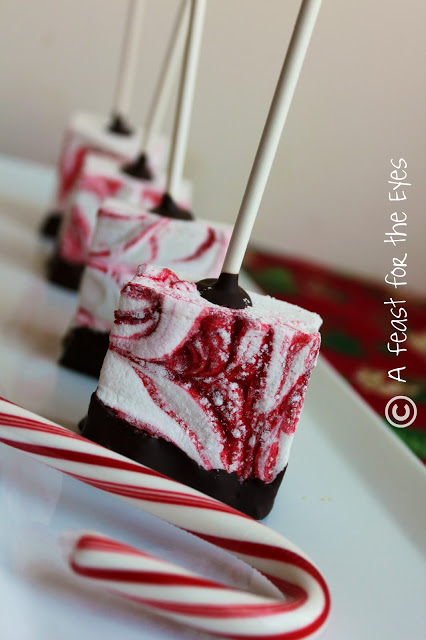
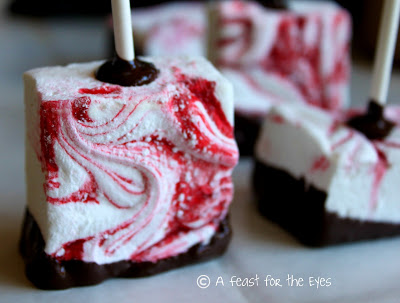
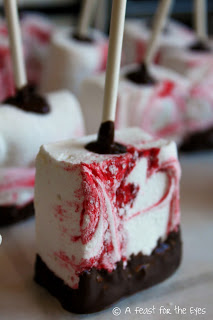
These Homemade Chocolate Dipped Peppermint Marshmallows are so versatile and fun to make. They taste so much better than the commercially made ones. Best of all, you can adapt the recipe with a variety of flavors. These Chocolate Dipped Peppermint Marshmallows were perfect for the holidays, and made great gifts.
Homemade marshmallows really aren’t terribly difficult to make. A stand mixer with a wire whip definitely makes the taste even easier. For the Christmas holidays, peppermint seems like a perfect flavor. I wanted to make some edible gifts for friends and family, and this recipe was going to be my maiden voyage in marshmallow making.
Guess what? It’s easy! The hardest part is having the right equipment and techniques. A stand mixer is priceless. You can make these with a hand-mixer, but I can’t guarantee that your biceps won’t be trembling after waiting about 12-15 minutes for the marshmallows to whip up.
I read a lot of reviews on Alton Brown’s recipe, but I didn’t have any problems with the recipe. For one, I did use a 9×13 baking pan and lots of powdered sugar (I nixed the cornstarch). I swear by Baker’s Joy non-stick spray, which proved to be my hero.
To make marshmallows, you need unflavored gelatin, corn syrup, sugar and ice water. From there, you can have carte blanc with flavors. For Christmas, obviously, peppermint seems perfect.
The first step is to “bloom” 3 packets of unflavored gelatin with ice cold water. While the gelatin is doing it’s thing, you need to make the syrup.
In a pot, with a lid, add sugar, water and corn syrup. Cook, lid on, for a few minutes and then remove the lid and insert a candy thermometer. Lightly boil until it reaches 240F. Need I say that you want to be very careful, as this is as hot as napalm?
Once the syrup reaches 240F, remove from heat. The gelatin looks hardened, turn the mixer (with whisk attachment) on low. Very carefully, and slowly, pour the syrup down the side of the mixing bowl.
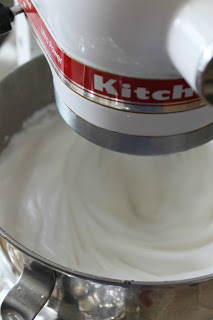
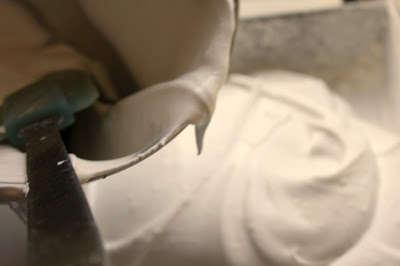
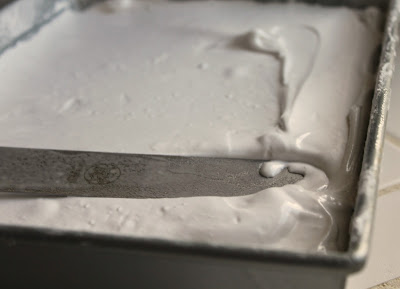
Once you have added all of the syrup, increase the speed to high. Continue to whip until the mixture becomes very thick and is lukewarm, approximately 12 to 15 minutes. You’ll know the marshmallow is ready, because it looks visibly thick– and you can see it separating from the sides of the bowl. Be sure that you have your prepared baking dish ready to go. Have an off-set spatula and regular spatula ready, sprayed with non-stick spray right next to it.
TASTING NOTES: As for the “ugly” fail batch of marshmallows… floating in a cup of hot chocolate, all melted and gooey, they are perfection! The marshmallows were soft, chewy and tasted like Christmas.I have found my new signature Christmas gifts. I also plan to make marshmallows in different flavors– toasted coconut. Yes? Mint? Yes. Oooooh, and I’m going to dip these in caramel. Yes, I am! Making homemade marshmallows is a lot of fun, and I hope that you try it, too.
How to Make Homemade Chocolate Dipped Peppermint Marshmallows
Equipment
- 24 cake pop sticks
- 1 9 x13-inch pan preferably a metal baking pan that doesn't have round corners
- wax paper and aluminum foil
- 1 sifter for powdered sugar
- 1 Stand Mixer with whisk attachment or a hand-mixer
- Non-stick spray
- very sharp knife or pizza cutter
Ingredients
- 3 0.25-ounce packages unflavored gelatin
- 1 cup ice cold water divided
- 1 1/2 cups granulated sugar
- 1 cup light corn syrup
- 1/4 teaspoon kosher salt
- 1 teaspoon vanilla extract
- 1 teaspoon pure peppermint extract
- 1/2 cup confectioners’ sugar
- red food coloring
- nonstick spray
- 4 to 6- ounces quality dark chocolate chopped, optional
Instructions
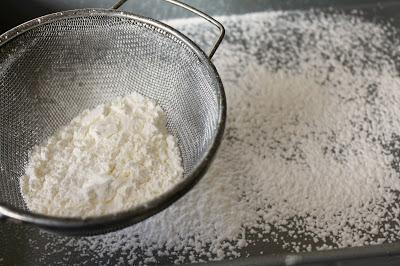
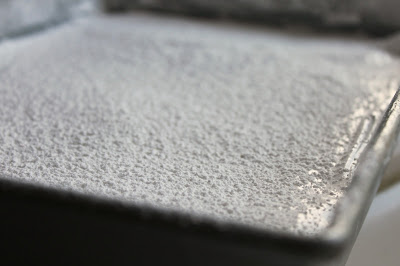
- Lightly spray a 13×9-inch metal baking pan with nonstick cooking spray. Sift the powdered sugar and completely coat the bottom and sides of the pan. Return the remaining sugar to the bowl for later use.
- Place the gelatin into the bowl of a stand mixer along with 1/2 cup of the water.
- In a small saucepan combine the remaining 1/2 cup water, granulated sugar, corn syrup and salt. Place over medium high heat, cover and allow to cook for 3 to 4 minutes.
- Uncover, clip a candy thermometer onto the side of the pan and continue to cook until the mixture reaches 240°F, approximately 7 to 8 minutes. Once the mixture reaches this temperature, immediately remove from the heat.
- Turn the mixer on low speed and, while running, slowly pour the sugar syrup down the side of the bowl into the gelatin mixture. Once you have added all of the syrup, increase the speed to high. Continue to whip until the mixture becomes very thick and is lukewarm, approximately 12 to 15 minutes.
- Add the vanilla and peppermint extract during the last minute of whipping. While the mixture is whipping prepare the pans.
- When ready, pour the mixture into the prepared pan, using a lightly oiled (or baking spray) off-set (or regular) spatula for spreading evenly into the pan.
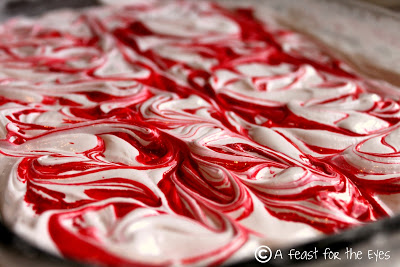
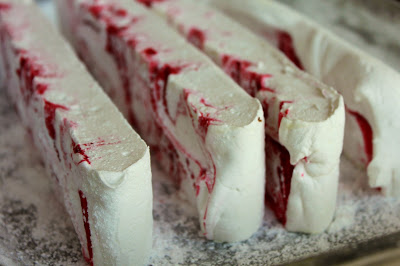
- If adding the red food color, add some random drops and then swirl with a toothpick.
- Dust the top with enough of the remaining powdered sugar to lightly cover. (Reserve the rest for later.)
- Cover the pan with foil and shake up, down and sideways. Allow the marshmallows to sit uncovered for at least 4 hours and up to overnight.
- To cut the marshmallows, I had great success with a very sharp knife, sprayed with non-stick spray.
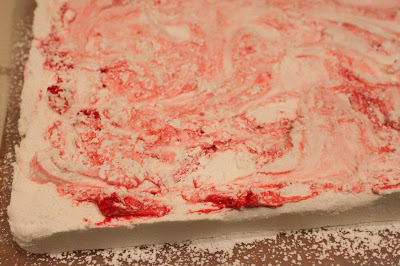
- Turn the marshmallows out onto a cutting board, lightly dusted with powdered sugar. Cut into 1-inch squares using sharp knife, or pizza wheel dusted with confectioners’ sugar mixture.
- Once cut, lightly dust all sides of each marshmallow with the remaining mixture, using additional if necessary.
- TIP: I cut strips of marshmallow, then placed them back into the baking pan, dusted with extra powdered sugar. I then gently pressed sugar on all of the freshly cut sides, so that they wouldn't be sticky. That technique worked great!
- Store in an airtight container for up to 3 weeks. I bagged a few marshmallows in a clear cellophane bag) and tied them with ribbon. They are perfect for hot chocolate.
TO COAT IN CHOCOLATE:
- Cut the chocolate into small chunks and place in a glass bowl, over a pot of simmering water. Do not let the bowl touch the water! Once melted, stir to smooth.
- Have a baking sheet, covered with wax paper on standby. If using cake pop sticks, dip the stick into the chocolate at about 1/4-inch deep. Carefully plunge the stick into the marshmallow. Dip the bottom of the marshmallow to coat the bottom and slightly up the side. Set on the wax paper.
- Allow the dipped marshmallows to set for at least at hour. I placed 2 to 3 marshmallows in tall cellophane bags and tied them with a ribbon.










Really a feast for my eyes…looks awesoe
Your chocolate dipped peppermint marshmallows look amazing! I simply couldn't get enough chocolate and peppermint this season.
And by the way, I second everything you mentioned about being a super organized blogger. I don't have it in me to be that way.
this looks so yummy and aesthetically beautiful.
There were so many things I intended to make on Christmas that just got dropped as I ran out of time. It happens. BUt these marshmallows are truly gorgeous!
I didn't host holiday dinners this year because I couldn't take off work. I made a couple dishes on Thanksgiving and let everyone else handle Christmas. If I don't have a day or two to prepare, I'm not going to have my entire family over. I know it was stressful, but kudos to you for trying!
One day I'll try marshmallows. They don't look too difficult. Maybe I'll be able to take time off from work next Christmas.
Beautiful marshmallows and just perfect for this time of year. I made them once – you just can't compare them to store-bought!
These are stunning! I hope you had a wonderful holiday!